내 친구 Vagrant를 소개합니다.

Vagrant는 가상화 인스턴스를 관리하는 소프트웨입니다. Vagrant의 실체는 가상 개발 환경을 생성하고 설정하기 위한 주요 가상화 소프트웨어의 고수준 레퍼입니다. Vagrant가 지원하는 가상화 기술은 다음과 같습니다.
- VirtualBox
- VMware
- KVM
- Linux Container(LXC)
- Docker
Vagrant는 위에서 나열한 프로바이더 기술을 기반으로하여 가상화 인스턴스를 효과적으로 생성하고 관리 일관성을 확보하는 방안을 제공합니다. Vagrant의 가장 매력적인 부분은 가상 인스턴스를 만들고 실행하는 과정이 매우 빠르고 편리하다는 것입니다.
Vagrant의 사전적인 의미는 “부랑자”/“정처없는 사람” 이라는 사전적인 의미를 갖습니다. Vagrant는 가상화 이미지를 효과적으로 만들고 테스트하는 유연한 환경이라는 의미에서 명명된 것이라고 생각됩니다. 쉽게 만들고 쉽게 버릴수 있고 다시 그 상태를 쉽게 복원할 수 있는 “Code as a Infrastructure” 개념을 반영한 오픈소스 프로젝트입니다.

Vagrant 프로젝트
Vagrant는 2010년 3월에 “Mitchell Hashimoto”가 시작한 오픈소스 프로젝트입니다. 2016년 2월 현재 최신 버전은 1.8.1입니다. 개발 언어는 Ruby이며 지원 플랫폼은 Linux, FreeBDS, OS X와 MS Window입니다. 2016년 현재 Vagrant의 주요 개발사는 HashiCorp입니다. HasiCorp는 샌프란시스코에 위치한 오픈소스 기업으로 2012년에 “Mitchell Hashimoto”가 설립하였습니다.
Vagrant는 초기에 VirtualBox만을 지원하는 형태로 개발되었습니다. 그후 1.1버전 부터 다른 가상화 기술을 지원하기 시작했습니다. VMware와 KVM은 1.1버전에서 지원이 추가되었습니다. 1.6버전에서는 Docker를 새롭게 추가하였습니다.
Vagrant 설치
앞에서 설명한 것처럼 Vagrant는 여러 가상화 프로바이더를 지원하는 툴입니다. 따라서 Vagrant를 설치하기 전에 사용할 가상화 프로바이더를 사전에 설치해야 합니다.
Vagrant의 기본 가상화 프로바이더는 VirtualBox입니다. VirtaulBox는 오라클가 프리웨어로 제공하는 가상화 기술입니다. 지원하는 운영체제는 Window, OS X, Linux, Solaris입니다. VirtualBox 설치 파일은 https://www.virtualbox.org 에서 다운받을 수 있습니다. VirtualBox 설치 파일의 크기는 운영체제에 따라 약간의 차이는 있지만 약 100Mb 내외 입니다.
앞에서 설명한 것 처럼 Vagrant는 Ruby로 개발된 소프트웨어 입니다. 따라서 RubyGem으로 설치 가능합니다. 그러나 Vagrant 프로젝트에서는 RubyGem을 이용한 설치하는 방법보다 Vargant 홈페지이에서 바이너리를 다운로드 하는 것을 권장하고 있습니다. RubyGem을 사용할 경우 이전 버전이 설치될 가능성이 높기 때문입니다. Vagrant 다운로드 URL은 다음과 같습니다.
다운받은 Vagrant 설치 파일로 부터 설치를 완료한 후, Vagrant의 설치는 다음과 같은 명령으로 확인 할 수 있습니다.
taewan:demo taewan$ vagrant version
Installed Version: 1.8.1

Vagrant was unable to check for the latest version of Vagrant.
Please check manually at http://www.vagrantup.com
taewan:demo taewan$
Vagrant 간단 둘러보기
Vagrant Quick-Start를 하기 앞서 간단히 Vagrant 가 동작하는 방식에 대하여 알아보겠습니다. Vagrant는 일반적으로 다음과 같은 단계로 작업을 수행합니다.
- Box 이미지 다운로드
- Box이미지를 이용하여 프로젝트 생성
- 프로젝트 최상위 디렉터리에 위치한 Vagrantfile 파일 수정
- 프로젝트의 가상 인스턴스 시작
- 가상 이미지 접속 및 작업
- 가상 이미지 종료
Vagrant는 프로젝트를 생성하기 앞서 여러 프로젝트가 공통적으로 사용할 Box를 다운로드합니다. Box란 Vagrant에서 가상 이미지로 사용할 수 있도록 초기 설정된 바이너리 입니다. Vagrant의 메인 개발사인 hashicorp는 여러 운영체제로 만든 Box를 제공합니다. hasicorp의 “Atlas box catalog”에서 Box를 검색하고 다운로드 할 수 있습니다. Box를 검색하고 다운로드를 지원하는 “Atlas box catalog”의 URL은 다음과 같습니다.

“Atlas box catalog” 혹은 Box의 URL을 파라미터로 “vagrant box add” 명령을 이용하여 Box를 다운로드 할 수 있습니다. 다운받은 기본 Box는 ~/vagrant.d/boxes 디렉터리에 저장됩니다. 이 디렉터리에 위치한 각 Box는 프로바이더 별로 디렉터리를 구분하여 저장되며, 각 프로바이더 폴더에는 4개의 파일이 저장되어 있는 것을 확인 할 수 있습니다.
taewan:demo taewan$ vagrant box add  ubuntu/trusty64
==> box: Loading metadata for box 'ubuntu/trusty64'
    box: URL: https://atlas.hashicorp.com/ubuntu/trusty64
==> box: Adding box 'ubuntu/trusty64' (v20160206.0.0) for provider: virtualbox
    box: Downloading: https://atlas.hashicorp.com/ubuntu/boxes/trusty64/versions/20160206.0.0/providers/virtualbox.box
==> box: Successfully added box 'ubuntu/trusty64' (v20160206.0.0) for 'virtualbox'!
taewan:demo taewan$ vagrant box list
ubuntu/trusty64 (virtualbox, 20160206.0.0)
taewan:demo taewan$
taewan:demo taewan$ ls -al ~/.vagrant.d/boxes/
total 0
drwxr-xr-x  3 taewan  staff  102  2 10 00:00 .
drwxr-xr-x  9 taewan  staff  306  2 10 00:00 ..
drwxr-xr-x  4 taewan  staff  136  2 10 00:00 ubuntu-VAGRANTSLASH-trusty64
taewan:demo taewan$ tree ~/.vagrant.d/boxes/ubuntu-VAGRANTSLASH-trusty64/
/Users/taewan/.vagrant.d/boxes/ubuntu-VAGRANTSLASH-trusty64/
├── 20160206.0.0
│   └── virtualbox
│       ├── Vagrantfile
│       ├── box-disk1.vmdk
│       ├── box.ovf
│       └── metadata.json
└── metadata_url

2 directories, 5 files
taewan:demo taewan$
Vagrant는 가상 이미지 관리하기 위해서 프로젝트를 만듭니다. 각 프로젝트의 최상위 디렉터리에는 Vagrantfile 파일이 위치합니다. 이 파일은 Vagrant로 관리되는 가상 이미지 설정을 포함합니다.
프로젝트 최상위 디텍터리에서 “vagrant up” 명령을 최초로 실행하면 vagrant는 “~/vagrant.d/boxes”에 위치한 box 이미지를 복사하여 지정된 프로바이더에 맞는 가상 이미지를 생성하고 Guest OS를 실행합니다.
Vagrant 5분 실습
Vagrant로 CentOS 가상 인스턴스를 만들고 로그인하여 사용하는 간단한 데모를 진행하겠습니다.
Box 이미지 카탈로그 조회
현재 호스트 머신에 설치된 Box이미지의 목록을 조회합니다.
demo taewan$ vagrant box list
ubuntu/trusty64 (virtualbox, 20160206.0.0)
demo taewan$
현재 호스트 머신에는 CentOS 이미지가 없는 것을 확인 할 수 있습니다. “Atlas box catalog”에서 CentOS를 검색합니다.
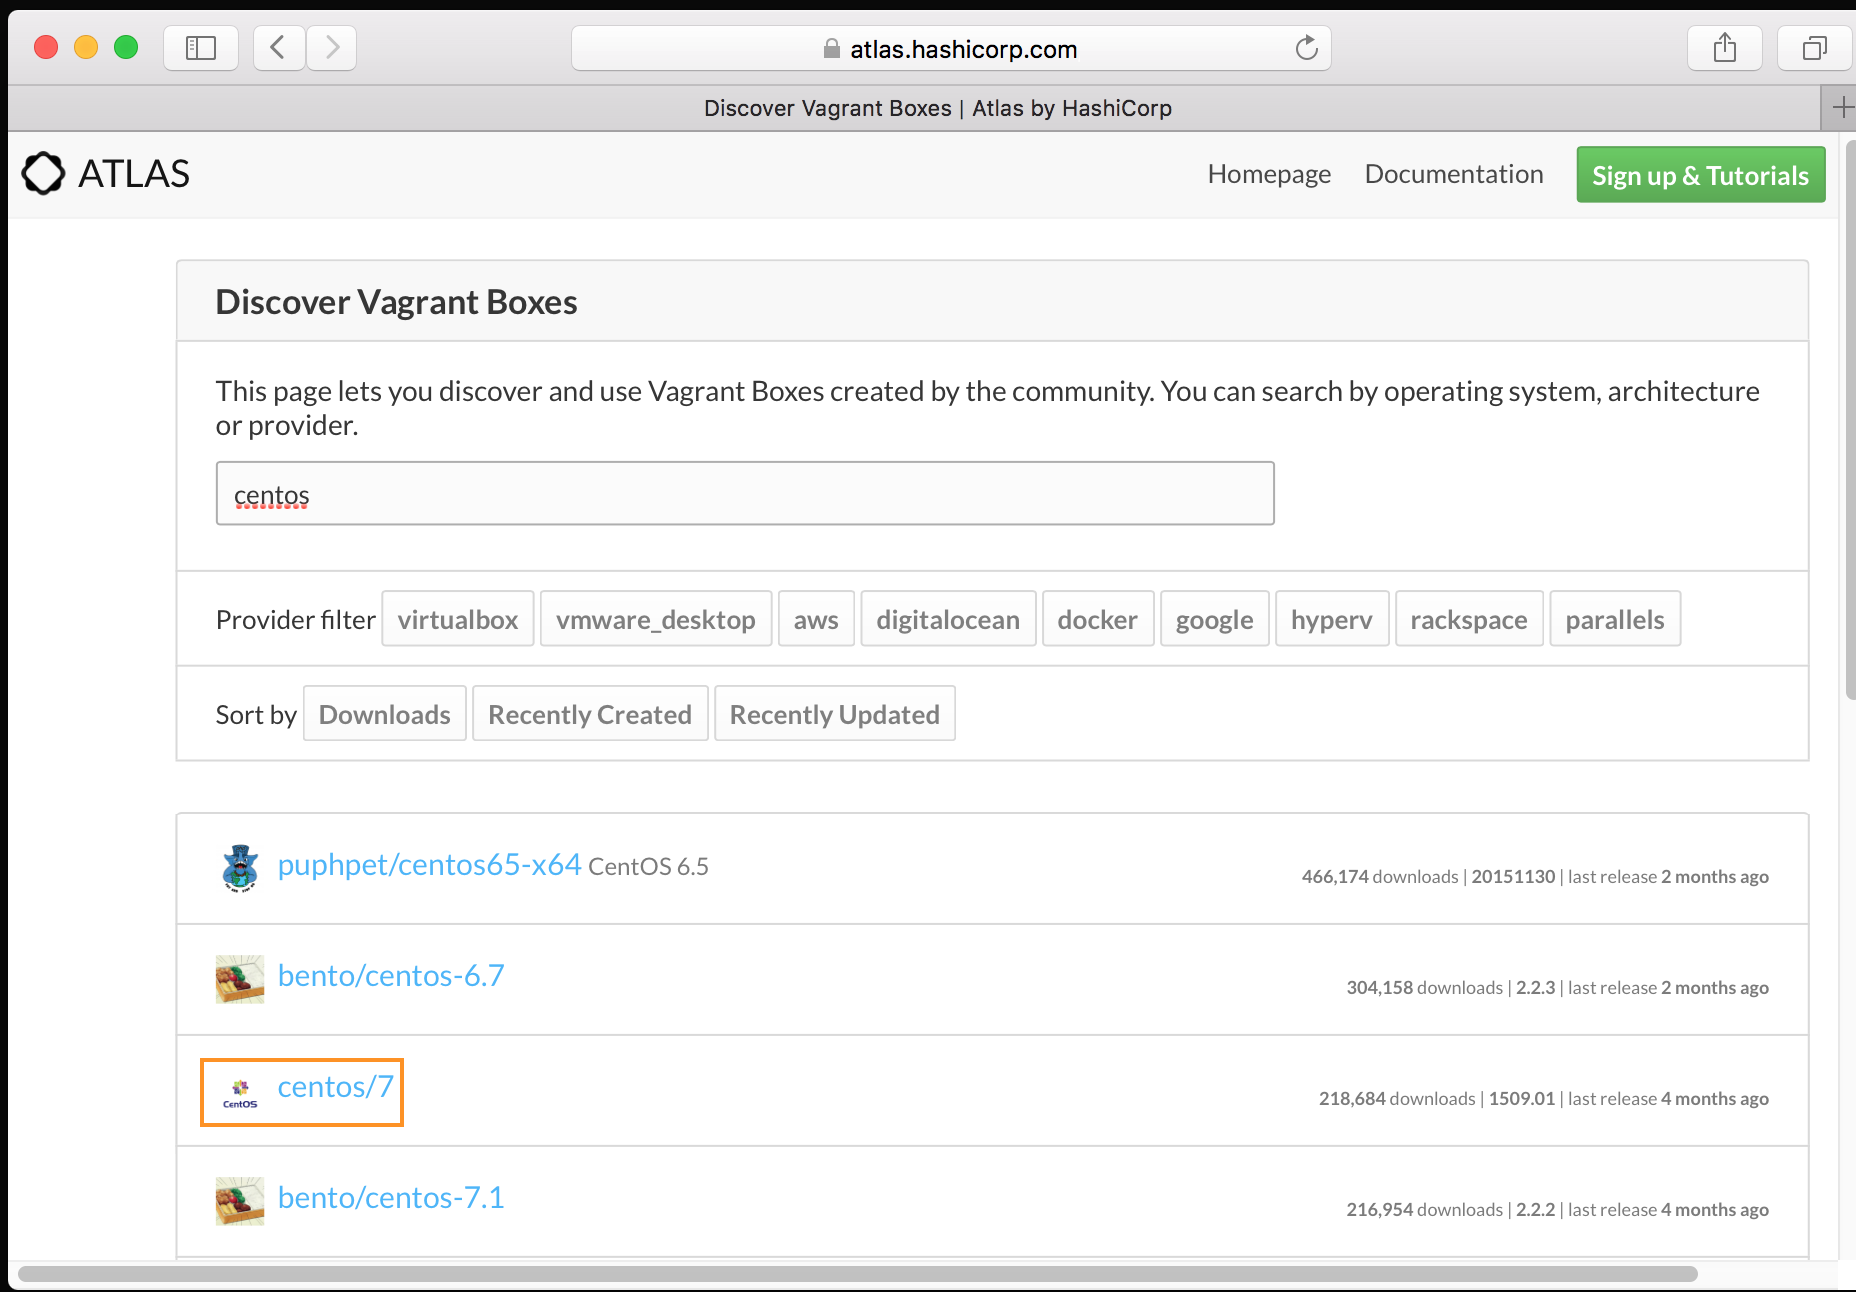
위 검색 결과에서 “centos/7”을 사용할 것을 결정합니다.
Box 이미지 다운로드
“vagrant box add” 명령으로 앞으로 사용할 CentOS 기본 이미지를 다운로드 합니다.
demo taewan$ vagrant box add centos/7
==> box: Loading metadata for box 'centos/7'
    box: URL: https://atlas.hashicorp.com/centos/7
This box can work with multiple providers! The providers that it
can work with are listed below. Please review the list and choose
the provider you will be working with.

1) libvirt
2) virtualbox

Enter your choice: 2
==> box: Adding box 'centos/7' (v1509.01) for provider: virtualbox
    box: Downloading: https://atlas.hashicorp.com/centos/boxes/7/versions/1509.01/providers/virtualbox.box
==> box: Successfully added box 'centos/7' (v1509.01) for 'virtualbox'!
demo taewan$
설치가 완료되면 “vagrant box list”명령으로 설치 결과를 확인할 수 있습니다.
demo taewan$ vagrant box list
centos/7        (virtualbox, 1509.01)
ubuntu/trusty64 (virtualbox, 20160206.0.0)
demo taewan$
Vagrant 프로젝트 생성 및 설정 파일 확인
Vagrant 프로젝트를 생성할 디렉터리를 생성한 후 Vagrant 프로젝트 초기화를 수행합니다. 프로젝트 초기화 명령(vagrant init)을 실행할 때 사용할 box를 지정할 수 있습니다.
workspace taewan$ pwd
/Users/taewan/workspace
workspace taewan$ vagrant init centos/7
A `Vagrantfile` has been placed in this directory. You are now
ready to `vagrant up` your first virtual environment! Please read
the comments in the Vagrantfile as well as documentation on
`vagrantup.com` for more information on using Vagrant.
workspace taewan$ ls
Vagrantfile
workspace taewan$ tree
.
└── Vagrantfile

0 directories, 1 file
workspace taewan$ cat Vagrantfile
# 주석 제거
Vagrant.configure(2) do |config|
  config.vm.box = "centos/7"
end
workspace taewan$
Vagrant 가상 이미지 실행 및 ssh 접근
“vagrant up”명령으로 가상 이미지를 실행하고 “vagrant ssh”명령으로 가상 이미지에 ssh 접근이 가능합니다.
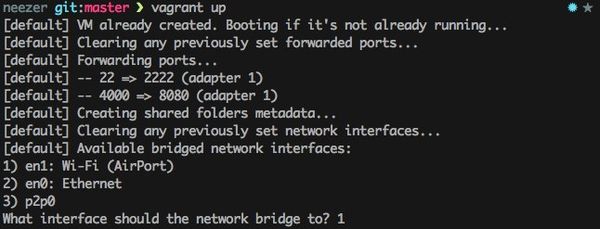
workspace taewan$ vagrant up
Bringing machine 'default' up with 'virtualbox' provider...
==> default: Importing base box 'centos/7'...
==> default: Matching MAC address for NAT networking...
==> default: Checking if box 'centos/7' is up to date...
==> default: Setting the name of the VM: workspace_default_1455162125926_16977
==> default: Clearing any previously set network interfaces...
==> default: Preparing network interfaces based on configuration...
    default: Adapter 1: nat
==> default: Forwarding ports...
    default: 22 (guest) => 2222 (host) (adapter 1)
==> default: Booting VM...
==> default: Waiting for machine to boot. This may take a few minutes...
    default: SSH address: 127.0.0.1:2222
    default: SSH username: vagrant
    default: SSH auth method: private key
    default:
    default: Vagrant insecure key detected. Vagrant will automatically replace
    default: this with a newly generated keypair for better security.
    default:
    default: Inserting generated public key within guest...
    default: Removing insecure key from the guest if it's present...
    default: Key inserted! Disconnecting and reconnecting using new SSH key...
==> default: Machine booted and ready!
==> default: Checking for guest additions in VM...
    default: No guest additions were detected on the base box for this VM! Guest
    default: additions are required for forwarded ports, shared folders, host only
    default: networking, and more. If SSH fails on this machine, please install
    default: the guest additions and repackage the box to continue.
    default:
    default: This is not an error message; everything may continue to work properly,
    default: in which case you may ignore this message.
==> default: Installing rsync to the VM...
==> default: Rsyncing folder: /Users/taewan/workspace/ => /home/vagrant/sync
workspace taewan$ vagrant ssh
[vagrant@localhost ~]$ uname -a
Linux localhost.localdomain 3.10.0-229.14.1.el7.x86_64 #1 SMP Tue Sep 15 15:05:51 UTC 2015 x86_64 x86_64 x86_64 GNU/Linux
[vagrant@localhost ~]$ exit
logout
Connection to 127.0.0.1 closed.
workspace taewan$
ssh config 파일 수정
간편한 접근을 위하여 vagant는 ssh config 설정을 제공하는 명령을 제공합니다. “vagrant ssh-config –host [hostname]” 명령으로 ssh config를 위한 내용을 확인할 수 있습니다. 이 결과는 리다이렉션을 이용하여 ~/.ssh/config에 적용할 수 있습니다. ssh config가 적용된 이후에는 ssh [hostname]으로 접근 가능합니다.
workspace taewan$ # ssh config 설정 확인
workspace taewan$ vagrant ssh-config --host demo
Host demo
  HostName 127.0.0.1
  User vagrant
  Port 2222
  UserKnownHostsFile /dev/null
  StrictHostKeyChecking no
  PasswordAuthentication no
  IdentityFile "/Users/taewan/workspace/.vagrant/machines/default/virtualbox/private_key"
  IdentitiesOnly yes
  LogLevel FATAL

workspace taewan$ # ssh config 적용
workspace taewan$ vagrant ssh-config --host demo >> ~/.ssh/config
workspace taewan$ # ssh 접근
workspace taewan$ ssh demo
Last login: Wed Feb 10 22:43:45 2016 from 10.0.2.2
[vagrant@localhost ~]$ uname -a
Linux localhost.localdomain 3.10.0-229.14.1.el7.x86_64 #1 SMP Tue Sep 15 15:05:51 UTC 2015 x86_64 x86_64 x86_64 GNU/Linux
[vagrant@localhost ~]$ exit
logout
Connection to 127.0.0.1 closed.
workspace taewan$
Vagrant 상태 확인 및 종료
다음 명령으로 Vagrant 인스턴스의 상태를 확인하고 종료할 수 있습니다.
workspace taewan$ # 인스턴스 상태 확인
workspace taewan$ vagrant status
Current machine states:

default                   running (virtualbox)

The VM is running. To stop this VM, you can run `vagrant halt` to
shut it down forcefully, or you can run `vagrant suspend` to simply
suspend the virtual machine. In either case, to restart it again,
simply run `vagrant up`.
workspace taewan$ # 인스턴스 종료
workspace taewan$ vagrant destroy
    default: Are you sure you want to destroy the 'default' VM? [y/N] y
==> default: Forcing shutdown of VM...
==> default: Destroying VM and associated drives...
workspace taewan$ # 인스턴스 상태 확인
workspace taewan$ vagrant status
Current machine states:

default                   not created (virtualbox)

The environment has not yet been created. Run `vagrant up` to
create the environment. If a machine is not created, only the
default provider will be shown. So if a provider is not listed,
then the machine is not created for that environment.
taewanui-MacBook-Pro:workspace taewan$
동영상 데모 - Vagrant Quick-Start (4min)
Vagrant 명령 요약
- vagrant -v : 버전 확인
- vagrant status : 현재 프로젝트의 가상 이미지 상태 요약
- vagrant global-status : 호스트 머신 전체의 Vagrant 가상 이미지들의 상태 확인
- vagrant up : Vagrant 가상 이미지 시작
- vagrant halt : 가상 인스턴스 강제 종료
- vagrant destroy : 가상 이미지 종료 및 기존 이미지 삭제
- vagrant suspend : 가상 인스턴스 하이버네이트, 상태 보존
- vagrant resume : 중지된 인스턴스 시작
- vagrant reload : 변경된 VagrantFile 적용
- vagrant ssh : 현재 프로젝트의 가상 이미지에 ssh 접근